ForgeTax Frenzy Guide: Trigger, Window & Safe Usage
The ForgeTax Frenzy guide: how 10 successful strikes charge Frenzy, what the 4-second window changes, and how to exit before the risk curve flips on your blade.
This ForgeTax Frenzy guide explains the game's single most powerful window: what triggers it, what it protects you from, and how experienced players convert it into value without getting greedy. Frenzy — described by one streamer as "fever time" — is a short state of rapid, safe forging that rewards preparation and punishes improvisation. If you learn one advanced mechanic in your first week, make it this one.
How Frenzy Triggers in ForgeTax
Frenzy charges through consecutive successful strikes on the same sword. The dragon himself states the rule: ten successful hits on one sword trigger the god-like effect. The charge counter is per-blade, so switching swords resets your progress toward the window.
That design has a direct consequence: momentum building is a deliberate activity, not an accident. Players who chain strikes on a blade with room to grow are charging the window; players who strike randomly across several blades are spending the same effort for nothing. Track your consecutive successes the way you track value.
What Happens During the Frenzy Window
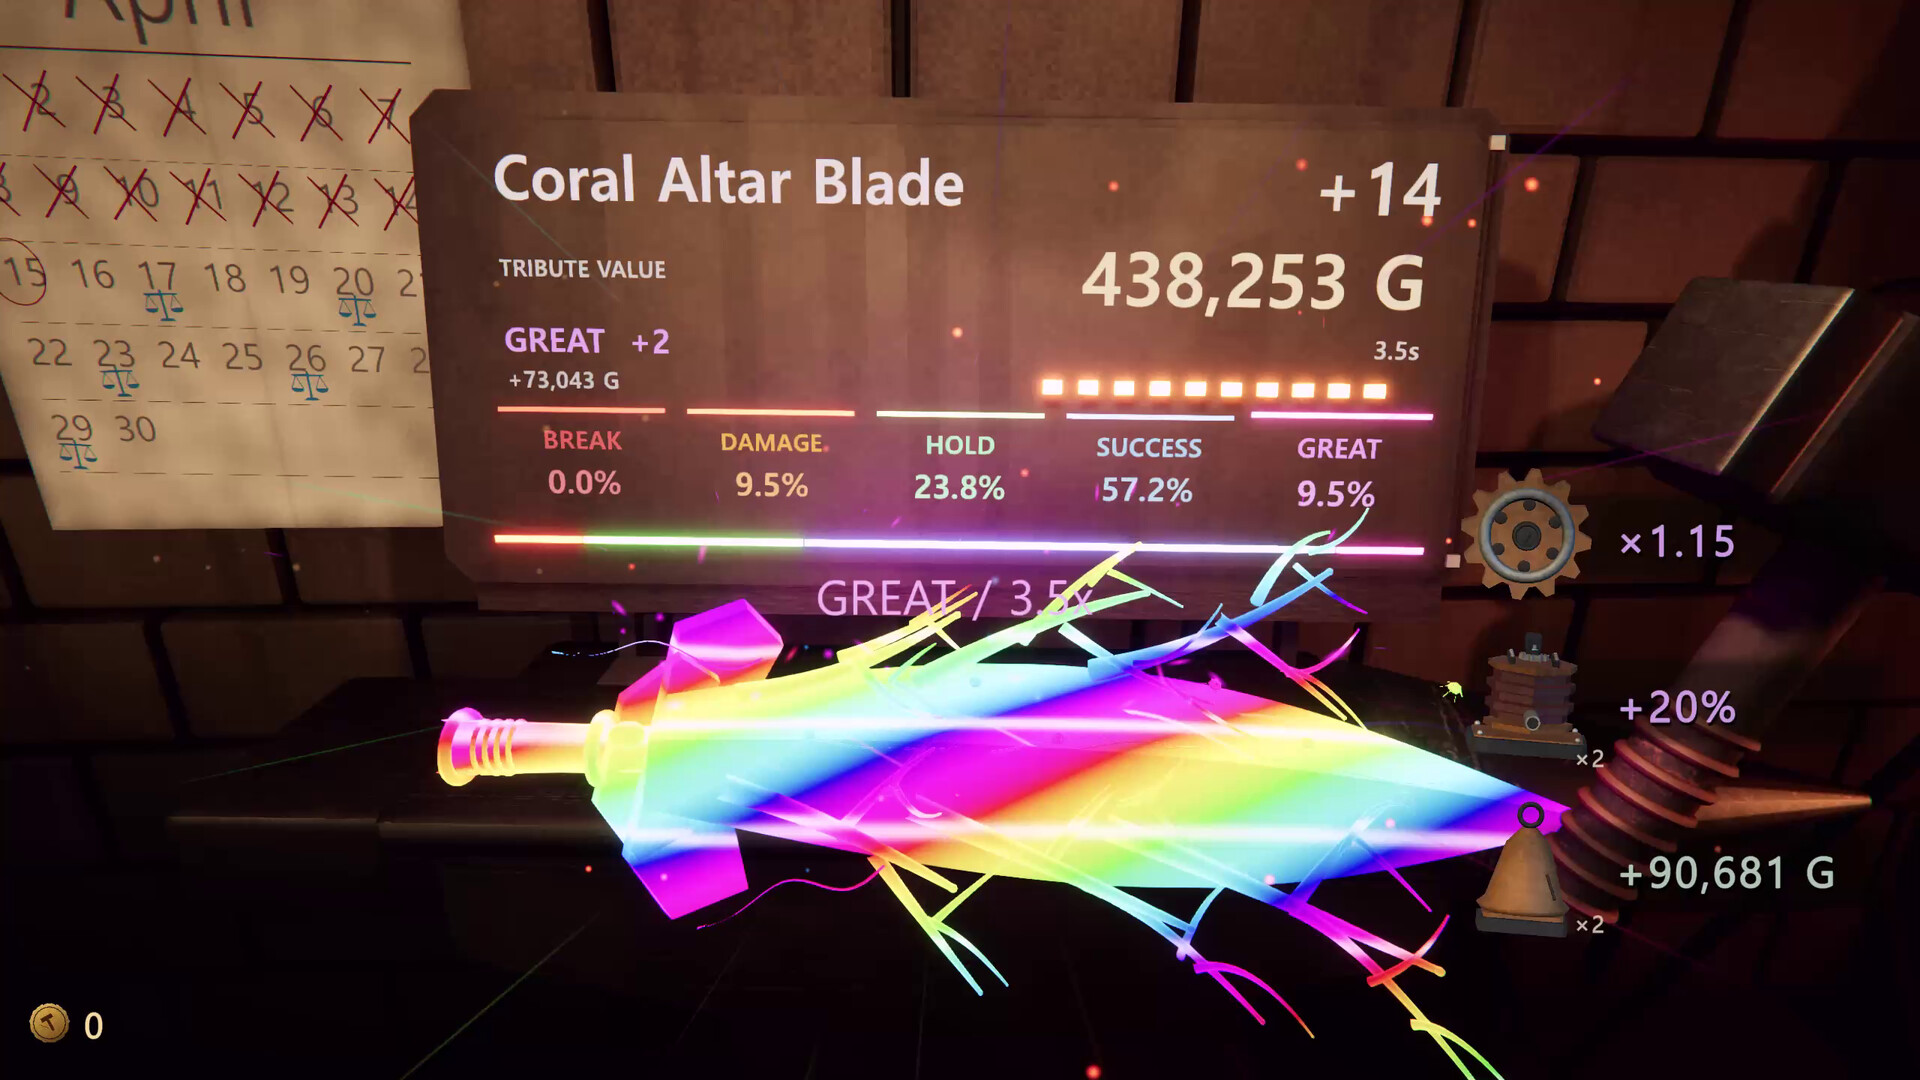
During Frenzy, forging speed rises sharply and strikes cannot shatter the sword. Data miners peg the window at about 4 seconds of real time, with the hammer swing interval at 0.64 seconds divided by any speed bonuses from relics. In plain terms: the faster your hammer — and your clicking — the more strikes you fit inside the window.
The safety is the real prize. A window where break risk is switched off is the best moment to push a valuable blade past the point where you would normally stop. One streamer summarized the community view bluntly: ten hits is the best thing in the game, and breaking a blade before reaching it is what careless play looks like.
The Five-Step Safe Frenzy Method
Guides across the community converge on the same five-step loop:
- Preparation: ready a blade with room to grow. Do not spend rare relics or tickets before the blade has a reason to continue.
- Momentum: forge consecutively to build the state, tracking the cost of each extra strike — longer is not automatically better.
- Recognition: confirm Frenzy is active from the visible state indicator before committing scarce resources.
- Conversion: spend the window only on high-value actions on the prepared blade — no low-value experiments, no switching targets mid-window.
- Exit: stop before the risk curve flips. When the next strike's expected value drops below the potential loss, end the sequence and bank the result.
The exit step matters as much as the trigger. Locking in a strong result is part of Frenzy play, not a failure to maximize it.
Speed Relics and the Window
Speed relics are the multiplier on everything above. Because the window lasts a fixed few seconds, the number of strikes you land depends on hammer speed — and speed relics directly shorten the swing interval. Players consistently report that speed investments only became obvious once they understood Fever Time: speed is a Frenzy stat first.
Hourglass-type relics extend the window itself, which compounds with speed. If your run plan is Frenzy-focused, the relic direction is clear: window duration first, hammer speed second, and value amplification third.
Target Selection: Where to Spend Frenzy
Frenzy belongs on high-potential, already-prepared blades. Spending the window on a cheap testing blade wastes the one state where break risk disappears, and it cannot be banked for later. The community rule is simple: practice risky timing on cheap blades instead, and save the window for blades whose added strikes translate into real value.
Also keep the tribute in mind. A Frenzy-pushed blade can overshoot a tribute target comfortably, but pushing the blade you intend to pay with is only correct if it was already qualifying before the window started. Never enter Frenzy needing luck to reach the minimum.
Frenzy and Achievements
At least one achievement requires completing a consecutive forging sequence and triggering the Frenzy state. Interrupting the chain — or stopping too early — can fail the sequence, so plan a dedicated attempt: pick a disposable mid-value blade, charge it patiently, and complete the window cleanly. Note that exact achievement conditions can change with patches, so treat specifics as subject to confirmation in-game.
Common Frenzy Mistakes
Three mistakes account for most wasted windows. First, triggering Frenzy with no prepared blade, then improvising targets while the timer runs. Second, continuing strikes after the value curve flattens, converting a safe bonus into ordinary risk the moment the window ends. Third, ignoring speed relics entirely, then landing only three or four strikes in a window that could have held eight.
Frenzy is a rhythm check as much as a mechanic: prepare, build momentum, recognize, convert, and exit. Run the loop the same way every time and the window stops being a gamble and becomes a scheduled payoff.
Related Guides
ForgeTax Beginner Guide: First-Run Steps & Core Systems
Learn the ForgeTax beginner guide core loop: forging swords, managing break risk, using the relic machine, and paying Dragon Tributes safely in your first runs.
ForgeTax Download: Steam Price, Release & Purchase Info
ForgeTax download guide: buy ForgeTax on Steam for $2.99, released September 29, 2026 by GraveYardDev — plus demo status, refund window, and scam avoidance.
ForgeTax Materials: Resource Types & Best Uses
ForgeTax materials explained: blades in progress, sword value, relic machine outputs, and draw tickets — plus gold, shop timing, and tribute reserves per run.
ForgeTax Resource Management: Run Survival Guide
ForgeTax resource management explained: balance sword value, relics, draw tickets, and tribute pressure so every run survives and avoids collapse.